Windows wird beim Booten nicht mehr angezeigt

B

Bearfunk

Mitglied
Thread Starter
Dabei seit
05.12.2022
Beiträge
22
Reaktionspunkte
1
Hallo MacUser,

Ich habe vorhin einen NVME-Reset gemacht, da mein cMP lange gebraucht hat bis das Bootx angezeigt wurde nach einem GPU Wechsel

Jetzt wird mir die Windows Bootcamp Partition nicht mehr angezeigt beim hochfahren.

In Mojave sehe ich sie aber noch unter Startvolumen.

Was kann ich machen?
 

Anhänge

  • 5D45E4A6-D22E-42A2-900C-69DB5A36E129.jpeg
    5D45E4A6-D22E-42A2-900C-69DB5A36E129.jpeg
    30,1 KB · Aufrufe: 66
  • 4D5CC107-438E-4363-BE2B-AEBA25AC1644.jpeg
    4D5CC107-438E-4363-BE2B-AEBA25AC1644.jpeg
    167,9 KB · Aufrufe: 67
  • 78B0EA94-F4C6-4D69-B928-D8D0F7844F07.jpeg
    78B0EA94-F4C6-4D69-B928-D8D0F7844F07.jpeg
    141,5 KB · Aufrufe: 63
Du meist PRAM Reset?

Bless halt Windows neu.
Geht auch über Startvolume.
 
Du meist PRAM Reset?

Bless halt Windows neu.
Geht auch über Startvolume.
Jap, mein Fehler ist meinte natürlich PRAM

Ich hab den 3x durchgeführt.

Bootcamp als Startvolumen ausgewählt habe ich schon, wird dennoch nicht angezeigt und auch nicht gebootet
 
Mit cmd klick ging glaube ich das Blessen in Startvolume.
PRAM löscht eigentlich nicht die Boot Einträge auf den Laufwerken.
 
So sieht’s aus mit gedrückter ALT-Taste ohne Opencore
 

Anhänge

  • 241B9942-BB9E-4FD7-905A-2C505721F5A6.jpeg
    241B9942-BB9E-4FD7-905A-2C505721F5A6.jpeg
    72,8 KB · Aufrufe: 63
Mit cmd klick ging glaube ich das Blessen in Startvolume.
PRAM löscht eigentlich nicht die Boot Einträge auf den Laufwerken.
Ich finde es auch sehr merkwürdig 🤨

Davor habe ich Windows täglich benutzt
 
Versuch mal, ob es so startet.
Im Terminal
Code:
sudo bless --mount "/Volumes/BOOTCAMP" --setboot --nextonly --legacy
Dann neu starten.
 
Dann musst du mal den MBR checken auf der Bootcamp disk.
 
Wie wurde Windows installiert?

per DVD / Windows Auswahl
oder per
USB Stick oder DVD / EFI Auswahl?

kannst auch mal

diskutil list

im Terminal zeigen


das ist wichtig weil du ein Uefi Windows nicht ohne OpenCore Schutz booten solltest. Sonst muss man die Zertifikate aus dem NVRAM per Neuaufbau rausholen.

Installiert per USB-Stick den ich selbst erstellt habe.

Kannst du mir bitte eine kurze Anleitung geben, wie ich das mit den Zertifikaten rausholen am besten mache?
 
Wie wurde Windows installiert?

per DVD / Windows Auswahl
oder per
USB Stick oder DVD / EFI Auswahl?

kannst auch mal

diskutil list

im Terminal zeigen


das ist wichtig weil du ein Uefi Windows nicht ohne OpenCore Schutz booten solltest. Sonst muss man die Zertifikate aus dem NVRAM per Neuaufbau rausholen.
Ganz oben hab ich ein Bild schon hochgeladen mit dem diskutil list
 
ok, übersehen, ich sehe GUID, dann wird's wohl UEFI sein. Über USB Stick kann man am Mac Pro gar nicht Legacy installieren.

Ich vermute da wurde (richtigerweise) der EFI Bootlader aus der Windows ESP entfernt.

Damit das Uefi Windows nicht ohne OpenCore startet, sonst gibts besagte Zertifikate.

Also OpenCore wieder blessen (im BootPicker mit gedrückter Ctrl-Taste starten, das Icon verändert sich und bekommt einen Pfeil).

Dann sollte Windows als Boot-Eintrag in OpenCore zu sehen sein und dort zu starten.


...


Die Zertifikate siehst du wenn du einen Firmware Dump machst, ich hab dafür ein Tool gebaut.

Thema 'Mac Pro 5.1 Rom / Firmware Backup Beschreibung und technischer Hintergrund'

erst mal den ersten Post lesen und dann etwa ab Seite 13 in dem Thread.

es gibt bei MacUser keine Wiki Threads, ich würde ja gerne den ersten Post ergänzen / berichtigen... So muss man solche langen Threads ein wenig von Hinten lesen. Man entwickelt sich und das Wissen weiter...


Edit: die Zertifikate bekommst Du raus wenn du dein Firmware Backup (ohne Zertifikate) wieder einspielst. Hast du kein Backup dann kann ich dir durch Neuaufbau des Roms helfen, dazu brauche ich einen Dump. In der Firmware steckt das NVRAM und in zwei Bereichen etliche IDs die einmalig sind wie unter Anderem die Seriennummer, die Backplane ID, etc etc.. Deshalb braucht man zum Neuaufbau einen Dump.

Da jeder Fehler beim Neuaufbau zu einem nicht mehr startfähigen Rechner führen werde ich den Teufel tun das zu beschreiben. Das mach ich dann lieber selber und prüfe das mit etlichen Tools und eigenen Signaturen. Bei der kleinsten Unsicherheit flashe ich das selbst auf einen offenen Aufbau.
 
  • Gefällt mir
Reaktionen: dg2rbf
Ist es nicht, hat er auch per Screenshot gezeigt neben dem diskutil.

ok, dann bin ich bei Windows einigermaßen raus, wie man ein UEFI Windows repariert ist nicht mein Gebiet.

An OpenCore wurde aber nichts verändert?

Aus dem OpenCore Guid in Macrumors hab ich noch: ExFatDxeLegacy.efi sei nötig. Weiß jetzt aber nicht ob zum Windows Installer Stick booten oder für UEFI Windows selbst.

ich kann mal den Windows Part aus der Anleitung zitieren:

--> (Vorsicht! Das erzeugt eine UEFI Installation die ohne OpenCore Schutz Zertifikate ins NVRAM bringt
die nicht mehr ohne Firmware Backup des Mac Pro oder externe Hilfe rausgehen). <--


Appendix: Windows

This part of the guide provides step-by-step instructions for installing Windows 10 or 11 on your Mac.


Prepare a USB installer

➊ Format a USB flash drive with at least 8 GB of space as ExFAT with the MBR partition scheme. This volume will be referred to as "USB".

You'll need the installer image:

Component ⠀ ⠀ ⠀ ⠀ ⠀ ⠀ ⠀Description ⠀ ⠀ ⠀ ⠀ ⠀ ⠀ ⠀ ⠀ ⠀ ⠀What to do ⠀ ⠀ ⠀ ⠀ ⠀ ⠀ ⠀ ⠀ ⠀ ⠀ ⠀ ⠀ ⠀ ⠀ ⠀ ⠀ ⠀ ⠀ ⠀ ⠀ ⠀ ⠀
Windows 10 or 11Installer image file (ISO)Follow the link, select the edition, then download

➋ Double click the image file. The volume will be referred to here as "CCCOMA_X64".
➌ In Terminal, enter the following command, replacing "USB" and "CCCOMA_X64" with the actual volume names:

rsync -r /Volumes/CCCOMA_X64/ /Volumes/USB

⚠️ Important: Don't forget the "/" after "CCCOMA_X64".

Let the task complete.


Format your Windows disk

✓ Format a disk with at least 32 GB of space as ExFAT with the GUID partition scheme. This volume will be referred to as "Disk C".


Install the ExFat driver

⚠️ If you're using OCLP and have been directed to this guide to install Windows, you can skip this step.

Component ⠀ ⠀ ⠀ ⠀ ⠀ ⠀ ⠀Description ⠀ ⠀ ⠀ ⠀ ⠀ ⠀ ⠀ ⠀ ⠀ ⠀What to do ⠀ ⠀ ⠀ ⠀ ⠀ ⠀ ⠀ ⠀ ⠀ ⠀ ⠀ ⠀ ⠀ ⠀ ⠀ ⠀ ⠀ ⠀ ⠀ ⠀ ⠀ ⠀
OcBinaryDataExFAT driverFollow the link, click the code button, then "download ZIP"

➊ Open OcBinaryData. In the folder "Drivers", you'll see a file "ExFatDxeLegacy.efi". Copy this file to your ESP as indicated below:

ESP
└── EFI
⠀⠀ ⠀├── BOOT
⠀⠀ ⠀└── OC
⠀⠀⠀⠀ ⠀ ⠀├── ACPI
⠀⠀⠀⠀ ⠀ ⠀├── config.plist
⠀⠀⠀⠀ ⠀ ⠀├── Drivers
⠀⠀⠀⠀ ⠀ ⠀│⠀ ⠀├── OpenCanopy.efi
⠀⠀⠀⠀ ⠀ ⠀│⠀ ⠀├── OpenRuntime.efi
⠀⠀⠀⠀ ⠀ ⠀│⠀ ⠀└── ExFatDxeLegacy.efi
⠀⠀⠀⠀ ⠀ ⠀├── Kexts
⠀⠀⠀⠀ ⠀ ⠀├── OpenCore.efi
⠀⠀⠀⠀ ⠀ ⠀├── Resources
⠀⠀⠀⠀ ⠀ ⠀└── Tools

➋ Enable the driver:

Find ⠀ ⠀ ⠀ ⠀ ⠀ ⠀ ⠀ ⠀ ⠀ ⠀ ⠀ ⠀ ⠀ ⠀ ⠀ ⠀ ⠀ ⠀ ⠀ ⠀ ⠀ ⠀ ⠀ ⠀ ⠀ ⠀Replace ⠀ ⠀ ⠀ ⠀ ⠀ ⠀ ⠀ ⠀ ⠀ ⠀ ⠀ ⠀ ⠀ ⠀ ⠀ ⠀ ⠀ ⠀ ⠀ ⠀ ⠀ ⠀ ⠀ ⠀
<key>UEFI</key>
<dict>
<key>Drivers</key>
<array>

</array>
<key>Input</key>


<key>UEFI</key>
<dict>
<key>Drivers</key>
<array>

<dict>
<key>Arguments</key>
<string></string>
<key>Comment</key>
<string></string>
<key>Enabled</key>
<true/>
<key>Path</key>
<string>ExFatDxeLegacy.efi</string>
<key>LoadEarly</key>
<false/>
</dict>
</array>
<key>Input</key>


Boot the installer

Before proceeding, make sure that
  • ProtectSecureBoot is set to true
  • The VMM flag is disabled
See Basic setup and Complete your setup.

➊ Reboot with the USB installer inserted, and select "Windows" from the OpenCore boot menu.
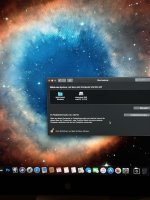
➋ When the Windows Setup window appears, press Shift-F10 to open Command Prompt.
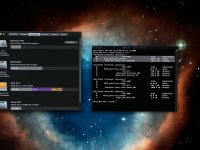

Identify your disks

➊ In Command Prompt, enter the following command:

diskpart

➋ At the DISKPART prompt, enter the following command
list volume

➌ Look for Disk C and your USB flash drive. You should see something like

Volume 1 ⠀ ⠀ C ⠀ ⠀ Disk C ⠀ ⠀ exFAT
Volume 2 ⠀ ⠀ D ⠀ ⠀ USB ⠀ ⠀ ⠀ exFAT

Note the actual volume numbers and letters.


Reformat your Windows disk

➊ Still at the DISKPART prompt, enter the following command, replacing "Volume 1" by the actual volume number of Disk C:

select volume 1

➋ If you are absolutely sure of the volume number, proceed by entering the following command:

format quick fs=ntfs label=Windows

Wait for the task to complete.

➌ Enter the following command:

exit


Proceed with the installation

➊ In Command Prompt, enter the following command, replacing "D" by the actual volume letter of the USB drive:

D:

➋ Now enter the following commands:

ren efi efi.bak

cd sources

dism /get-wiminfo /wimfile:install.wim

➌ Identify the index of the desired Windows version. You should see something like

Index : 1
Name : Windows 11 Home

➍ Enter the following command, replacing "1" by the actual index of the Windows version and "C" by the actual letter of Disk C:

dism /apply-image /imagefile:install.wim /index:1 /applydir:C:\ /compact /EA

Wait for the task to complete.

➎ Enter the following command, replacing "C" by the actual letter of Disk C and "D" by the actual letter of the USB drive:

bcdboot C:\Windows /s D: /f uefi

Wait for the task to complete.

➏ Finally, enter the following command:

exit

➐ Close the Windows Setup window by clicking the x and reboot into macOS.


Prepare your Windows EFI

➊ In Terminal, enter the following command:

diskutil list

➋ Look for the EFI Partition of Disk C, noting its identifier. It will be something like diskCs1.
➌ Enter the following command, replacing "diskCs1" by the actual identifier:

sudo diskutil mount /dev/diskCs1

The volume should appear as "EFI" in Finder. This is your Windows EFI.

➍ In your Windows EFI, create a folder "EFI".

➎ On the USB drive, in the folder "EFI", you will find a folder "Microsoft". Copy this folder to the folder you just created:

Windows EFI
└── EFI
⠀⠀ ⠀└── Microsoft

➏ On your USB flash drive, delete the folder "EFI" and rename "efi.bak" to "efi".
➐ Eject the drive.


Finish the installation

➊ Reboot and use the OpenCore boot menu to select "Windows".

The configuration process will begin and eventually your Mac will restart.

➋ Follow the guided steps to complete the installation.
 
Zuletzt bearbeitet:
  • Gefällt mir
Reaktionen: SirVikon
Also ich hatte ja genau die gleichen Probleme, dass nach Grafikkartenwechsel (ohne nativen Bootbildschirm) meine Windows Partition nicht mehr in OC angezeigt wurde. Vorher konnte ich halt mit gedrückter alt Taste einfach von Windows booten. Klingt hier ähnlich, das Problem.
 
Und hast du es gelöst bekommen?
 
Also ich hatte ja genau die gleichen Probleme, dass nach Grafikkartenwechsel (ohne nativen Bootbildschirm) meine Windows Partition nicht mehr in OC angezeigt wurde. Vorher konnte ich halt mit gedrückter alt Taste einfach von Windows booten. Klingt hier ähnlich, das Problem.
Du hast aber eine Legacy Installation gehabt, die erst nach Installieren eines weiteren Bootladers (rEFInd) in OpenCore startbar war.

Die hast du vorher über den EFI Bootpicker gestartet, die neue Grafikkarte hatte keinen Bootscreen.

Das hier ist scheinbar eine zerschossene UEFI Installation oder es fehlt was in OpenCore um (UEFI-Windows zu booten).
 
  • Gefällt mir
Reaktionen: dg2rbf und SirVikon
Zurück
Oben Unten